
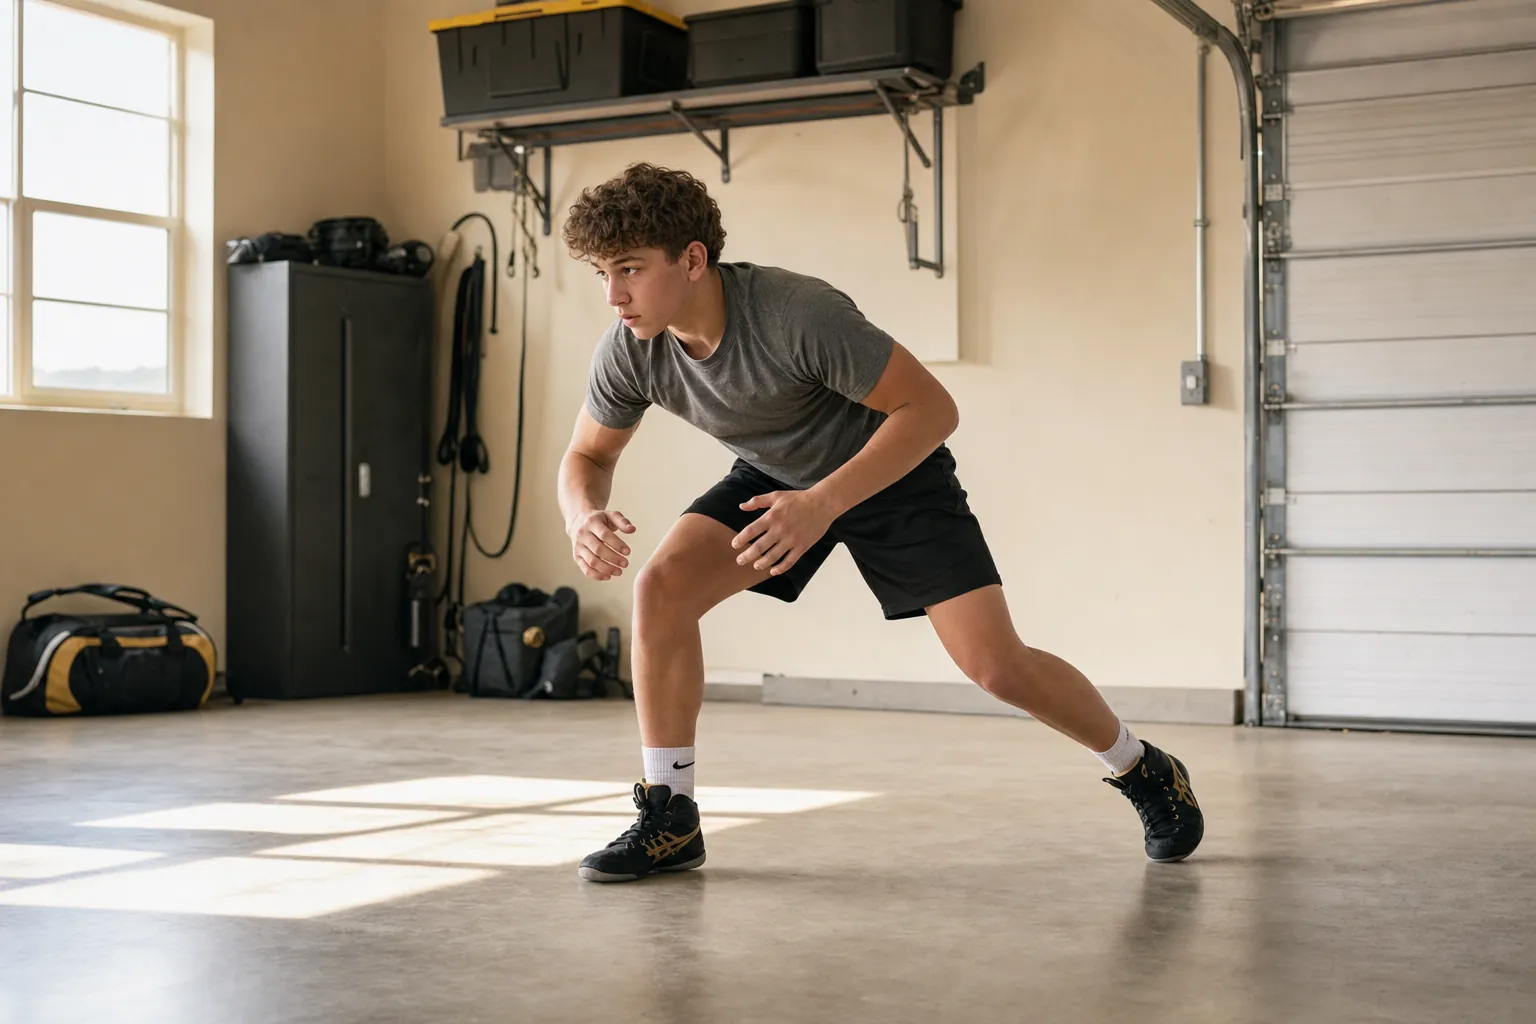
Wrestling drills at home can make a real difference when they sharpen a position you already know. They are not a replacement for a wrestling room, a live partner or a coach who can see the details. They are a way to keep the basics familiar between practices, especially when you have ten clear minutes and the choice is between doing something useful or doing nothing at all.
The best home work is simple enough to repeat safely. You need a small open space, shoes that will not slide, and a surface that makes sense for the drill. A garage, basement, hallway or clear living room can work for stance, footwork and shadow reps. It is not the place for throws, hard shots, live takedowns or anything that asks another person to absorb force without proper mats.
Think of this as a detail session. The goal is to finish feeling more coordinated, not wrecked. The USA Wrestling core curriculum starts with position and motion before attacks and situations. That order gives a useful home session its shape too: build the position first, then make the movement cleaner, then take that work back to practice.
Set up a space that keeps the drill honest
Before you start, remove the easy ways to get hurt. Clear loose rugs, bags, weights and furniture out of the movement area. Make sure there is enough room to take two or three steps in every direction without reaching for a wall. If your floor is hard, stay with standing movements and controlled bodyweight work. A folded exercise pad can be a visual marker for a knee touch, but it does not turn a hard floor into a wrestling mat.
Pick one skill for the session. Trying to fix stance, shots, hand fighting, conditioning and flexibility all at once usually creates a long, rushed workout with very little learning. A better choice is a 12-minute block with one cue, such as keeping your feet under your hips or lowering through the legs instead of folding at the waist.
Keep a simple stop rule: if the rep gets sloppy, slow down or end the round. You should be able to hold the finish of a movement for a second and recognize where your feet, knees, hands and head are. That pause is not wasted time. It is how you stop a bad repetition from becoming the version your body remembers.
1. Stance and motion: stay ready in a small space
Start in the stance your coach has taught you. Keep one foot slightly in front, bend through the ankles, knees and hips, and hold your hands where they can protect the space in front of you. From there, take short steps forward, back, left and right. The foot in the direction you are moving goes first, then the other foot catches up. Avoid crossing your feet or hopping tall between steps.
Use a square made with floor seams, tape or four water bottles placed well outside your path. Move for 20 seconds, rest for 20 seconds and repeat four rounds. Do two rounds with your usual lead leg, then two with the other lead. The work should be quiet enough that you can hear when your feet start slapping the floor. Quiet feet usually mean you are staying balanced enough to move again.

2. Level changes: use your legs, not your back
A clean level change lowers your hips while keeping your eyes and chest up. It is not a reach toward the floor. From stance, bend through the legs until your hands can touch the outside of your knees, then return to the same ready height. Keep the weight centered through your feet instead of drifting heavily toward the lead leg.
Do five slow repetitions on each lead leg. Pause at the bottom of each one. Ask whether you could still move, defend or take a short step from that position. If the answer is no, make the range smaller. A clean half-rep does more for wrestling than a deep, rushed squat that pulls your head down.
After the first set, add one angle step after the level change. Change level, step left, reset. Change level, step right, reset. This gives the movement a purpose without turning it into a shot on a hard floor. When you are back at practice, the same shape can feed the entries in the wrestling drills guide.
3. Penetration-step rehearsals: own the shape first
A penetration step is useful at home only when it stays controlled. Use a folded pad, a taped line or a small object as a marker instead of driving into the floor. From stance, change levels, bring the lead knee toward the marker, keep your hands in front, then bring the trail foot underneath you so you can return to stance. The finish should look balanced, not stretched out or collapsed over the lead knee.
Start with three slow repetitions per side. Freeze at the end of each rep, then walk back to your starting point. Pay attention to the trail foot. If it stays far behind you, the step will feel long and weak. If it comes underneath your hips, you have a better chance to drive, change direction or recover when an opponent moves.

Do not add speed because the drill starts to feel easy. Add quality instead. Try starting from the opposite lead leg, add one small setup step, or make the return to stance cleaner. The bigger finishing work belongs on a mat with a partner and a coach. At home, the win is making the starting shape automatic enough that you can use it well when live wrestling begins.
4. Shadow wrestling: connect the pieces without contact
Shadow wrestling is a short sequence of real shapes without pretending an invisible opponent will give you perfect reactions. Start in stance, move your feet, level change, take an angle step, rehearse one entry, then return to stance. You can add a light hand post in the air if it helps you keep your hands in the right place, but do not throw wild punches or reach far away from your body.
Use 30-second rounds with 30 seconds of rest. Give each round one job. In the first round, focus only on staying low while you move. In the second, focus on one clean level change every few seconds. In the third, add one controlled entry shape and an immediate return to stance. The point is to connect movement, not to sprint around the room.
Film one round from the side if a parent or teammate can do it safely. You are looking for a few simple things: Do your feet cross? Does your chest fall forward on the level change? Do your hands drop when you move? A short video will not replace coaching, but it can help you bring a specific question to the next practice instead of guessing.
5. Sprawl positions: rehearse, do not crash
A hard sprawl on tile, concrete or hardwood is a bad trade. You can still rehearse the idea of the position without slamming your hips into the floor. From stance, step one foot back, lower your hands to a stable surface such as the floor only if it is comfortable, or place them on a sturdy bench or couch edge, then extend the other leg behind you. Keep your head in a neutral position and return to stance under control.
Another option is a standing sprawl step. Have someone call "shot" or set a timer beep. Drop your level slightly, move one leg back and bring your hands forward as if you were protecting the space in front of you. Reset immediately. Ten controlled reactions can be enough. The goal is to teach your feet to move away from danger, not to create a conditioning punishment.
Save real sprawls, front-headlock positions and partner pressure for a safe mat. Those skills need feedback and space. Home practice should make you more prepared for that coaching, not create a shortcut that puts your neck, knees or training partner at risk.
6. Body-control drills: build coordination you can use
Wrestling asks you to control your body while changing levels, bracing and moving through awkward positions. A few simple body-control drills can help without turning the session into a random boot camp. Bear crawls, dead bugs, planks and controlled single-leg balances are useful because they make you coordinate your trunk, shoulders and hips while staying aware of position.

For a bear crawl, keep the knees close to the floor, move one opposite hand and foot at a time, and travel only as far as your space allows. Two slow trips across a room are enough. For a dead bug, lie on your back, keep your lower back gently connected to the floor and extend the opposite arm and leg without rushing. The goal is control, not a high rep count.
These drills support the strength and bracing work in the wrestling strength training guide. They are not a substitute for lifting or practice. They are a simple way to make your body feel organized when you are not in the room.
7. Build a 15-minute home wrestling block
Three minutes: stance and motion
Four 20-second rounds with 20 seconds of rest. Work your usual lead leg first, then switch.
Three minutes: level changes
Five slow repetitions per side, then add one controlled angle step after each rep.
Three minutes: penetration-step shapes
Three repetitions per side toward a floor marker. Freeze, check the trail foot, then return to stance.
Three minutes: shadow wrestling
Three 30-second rounds. Give each round one job: feet, level change, then entry and recovery.
Three minutes: body control
Two slow bear-crawl trips, a short plank and a few deliberate dead bug repetitions. Stop while the positions are still clean.
This block is intentionally short. It can fit before homework, after school or on a day when you cannot get to the wrestling room. If you have a full practice later, do less rather than trying to prove you worked hard twice. The wrestling warm-up guide can help you choose movements that prepare you for mat time without draining the session before it starts.
8. Make home reps carry into the wrestling room
Home drills work best when they reinforce one correction from practice. Maybe your coach wants your lead leg closer, your level change cleaner or your feet quieter in stance. Write the cue down, use it for a week, then ask whether the movement looked better in live drilling. That creates a loop between home practice and coaching instead of treating them as two separate workouts.
Be careful not to collect too many drills. A wrestler does not need a bigger list every week. They need a few positions they can repeat accurately enough that they show up under pressure. The most useful home session may be ten minutes of stance and motion done three times in a week, especially if that is the detail keeping you from getting to your best attacks.
Hands Raised is built around the work that does not always get seen. A quiet solo session counts when it helps you walk into the next practice more ready to learn. Read more in the Wrestling Training journal, see athletes who keep showing up in Athlete Spotlight, and explore the Hands Raised headwear collection when you want a reminder to keep earning the next rep.
Frequently asked questions
What wrestling drills can I do at home by myself?
Solo stance and motion, level changes, penetration-step rehearsals, sprawls on a safe surface, shadow wrestling, wall-position work and simple body-control drills can all fit at home. Keep the work controlled and leave throws, live takedowns and hard partner contact for a proper mat with qualified coaching.
Can I practice wrestling at home without a mat?
Yes, but the drill needs to match the surface and space you have. Stance and motion, level changes, hand-fighting shapes without contact, footwork and shadow wrestling can work in a clear room. Do not practice throws, takedowns, hard sprawls or anything that could send you into furniture, walls or another person.
How long should wrestling drills at home take?
Ten to twenty focused minutes is enough for most solo home sessions. Use short rounds, stop while the movement still looks clean and return to a skill often. A small useful block done regularly is better than one exhausting workout that leaves you too sore to practice well the next day.
Can beginners do wrestling drills at home?
Beginners can build useful habits at home when they stay with simple movements: stance, motion, level changes, safe entry shapes and body control. Use home practice to rehearse what a coach has already taught, then bring questions and corrections back to the wrestling room.
Related posts
Wrestling training
Wrestling Drills: 10 Fundamentals for Better Practice
Ten wrestling drills that sharpen stance, movement, entries and hand fighting without turning practice into a random workout.
Read the guide →
Wrestling training
Wrestling Stance: Build a Base That Holds Up
A practical guide to wrestling stance, movement and simple drills that help athletes stay ready to attack, defend and recover.
Read the guide →