
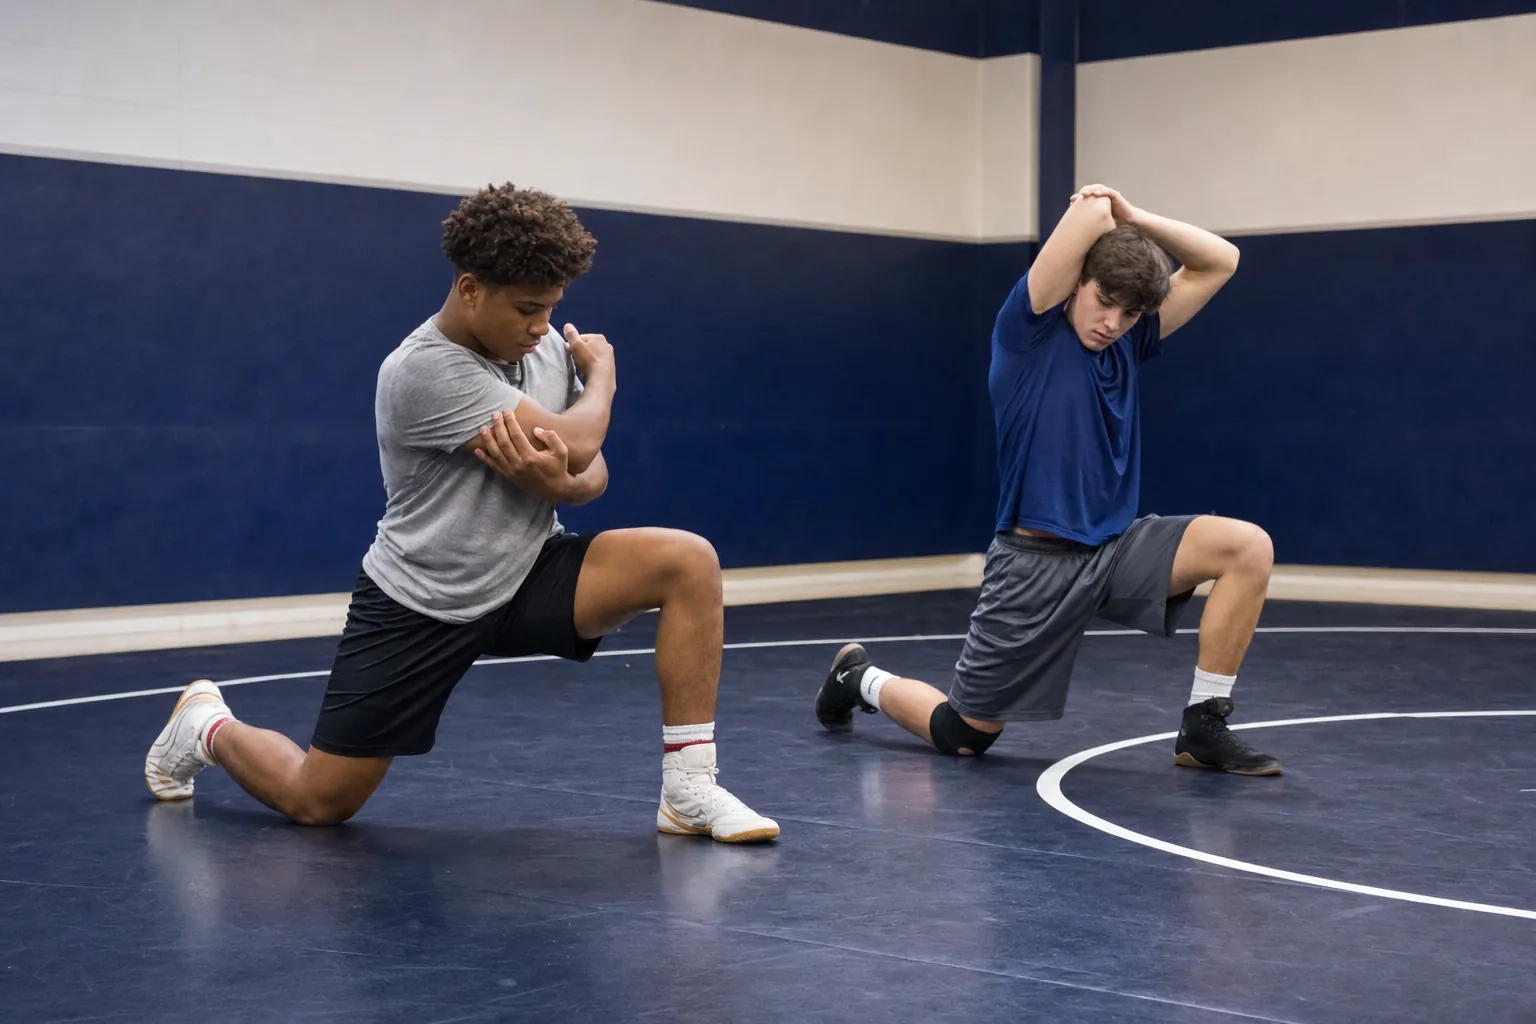
A wrestling warm-up should make the first good rep easier to find. It is not a punishment, a social lap around the mat or a long static stretch before somebody calls live. The right warm-up raises the temperature a little, wakes up the hips and shoulders, and reminds an athlete how a useful wrestling stance feels before the room gets fast.
That matters because wrestling asks for awkward positions on short notice. You need to change levels without folding, move your feet while your hands are busy, recover after a sprawl and stay balanced when a partner pulls you off line. A few minutes of focused prep cannot guarantee a great practice, but it can keep the first part of practice from being spent catching up to your own body.
This guide gives wrestlers, coaches and parents a simple way to build a 10 to 15 minute warm-up. Adjust it for the room, the athlete and the day. It is not medical advice or a replacement for a coach, athletic trainer or rehab plan after an injury.
Warm up for the work you are about to do
Good warm-ups have a job. Before a hard wrestling practice, the job is not to create a sweat at any cost. It is to move from easy activity into the shapes and reactions practice will ask for. That usually means a little general movement, active range of motion, wrestling stance and motion, then a few controlled partner actions.
A review in the Journal of Strength and Conditioning Research found that long static stretching immediately before speed or power work can reduce performance, while dynamic movement is generally the more useful pre-activity choice. In plain terms, get moving before practice. Save long, relaxed holds for later, when they fit your mobility plan.
USA Wrestling’s core curriculum organizes foundational wrestling from stance and motion through attacks, defense and situations. A useful warm-up follows the same common sense: prepare position first, then add movement, then add just enough partner response to make the movement feel real.
1. Raise the temperature without wasting energy
Start with two or three minutes of easy movement. Jog lightly around the mat, skip, shuffle, backpedal or use a bike if that is what the space allows. The pace should be conversational. If athletes are bent over and gasping before they have touched a wrestling position, the warm-up has already become conditioning.
Layer in simple changes of direction. On a coach’s call, take three quick side shuffles, turn and backpedal, then return to an easy jog. Keep the knees soft and the shoulders relaxed. The goal is not perfect footwork yet. It is to get ankles, knees, hips and arms moving through comfortable ranges before asking for lower stances and sharper reactions.
This opening also gives coaches a quick read on the room. An athlete who looks unusually stiff, limps, protects one side or seems dizzy needs attention before practice intensity rises. The National Athletic Trainers’ Association’s heat-safety guidance is a good reminder that dizziness, confusion, chills or symptoms that do not settle are not toughness problems. Tell a coach or athletic trainer and stop.
2. Open the positions wrestlers actually use
After the easy movement, spend three or four minutes on active mobility. Think of this as controlled movement through a useful range, not forcing a stretch until it hurts. Wrestlers often need hips that can lower into stance, ankles that can support a level change, shoulders that can reach and frame, and an upper back that can stay tall in a tie.
Choose four or five movements and give each one 20 to 30 seconds per side. Walking lunges with a reach, knee hugs to a calf raise, leg swings while holding a wall, half-kneeling hip shifts, arm circles and thoracic rotations are enough for most groups. Stay smooth. A warm-up is the wrong time to chase the deepest position in the room.
Keep the cue simple: move into the range you can control, then move back out. If a hip pinches, a shoulder catches or pain keeps increasing, do not force the stretch because everybody else is moving. Modify it, tell the coach and get qualified help when needed. A useful warm-up makes the body feel more available, not more irritated.

3. Rehearse stance and motion before adding contact
Now move from general athletic prep into wrestling. Start in a balanced stance with knees bent, chest up enough to see a partner and feet under the hips. Take short steps forward, backward and side to side without crossing the feet or bouncing tall between movements. Work 20 seconds in one lead leg, reset, then switch.
Next, add a level change every few steps. The hips and knees lower together while the eyes stay forward. Do not turn it into a squat contest. The athlete is rehearsing a position that could become an attack, a re-attack or a defensive recovery. A clean level change should feel like the body settling into a stronger angle, not folding toward the mat.
Use a mirror drill when a partner is available. One wrestler leads with controlled motion and the other stays at a safe distance, matching the direction changes. Switch every 20 seconds. This is a warm-up, so there is no need to fake a shot every step or turn it into a contest. The reward is athletes who arrive at the first technique drill already moving with their feet underneath them.

4. Add clean entries, sprawls and recovery positions
Once stance and motion look organized, rehearse a few low-cost wrestling actions. Use three to five controlled penetration steps per side, followed by three to five sprawls that finish in a strong base and return to stance. Go slow enough that the knee tracks well, the hands find the mat safely and the athlete can show the finishing position.
For penetration steps, start from stance, change level, step to the knee with the trail leg ready to drive and finish tall enough to see ahead. For sprawls, send the legs back with control, keep hips heavy without slamming the body into the mat, then recover back to stance. The purpose is rehearsal. Save the full-speed reaction drill for after the body has shown it can hit the shape correctly.
These two movements connect well with the site’s wrestling drills guide, which breaks down stance, level changes, penetration steps and hand fighting in more detail. Athletes who lose their position because their legs or trunk give out can also use the wrestling strength training guide to build a more durable base outside practice.

5. Use light partner work to switch on reactions
The final two or three minutes can include light partner work. Start with hand touch, inside-control pummeling, collar-tie clears or a cooperative snap-and-recover. The resistance should be low enough that partners can move well and communicate, but real enough that hands, head position and feet have to work together.
A simple option is 20 seconds of inside-control fighting followed by a reset. Another is a light collar tie, one clean clear and an angle step, then switch roles. Do not ask athletes to win the exchange. Ask them to find the position. That keeps the warm-up useful for beginners and gives more experienced wrestlers a chance to sharpen small details before practice ramps up.
Save hard hand fighting, hard shots and live goes for the part of practice built to coach them. The warm-up should leave athletes alert, not tired and frustrated. If the first drill after warming up looks flatter than the warm-up itself, the opening block is doing too much.
A 12-minute wrestling warm-up routine
This routine fits before a normal practice or as the first station in a small group. It is intentionally simple. Use it for two weeks, notice where the room gets sloppy, then make one adjustment instead of replacing everything with a new routine every day.
Minutes 0 to 2: easy movement
Light jog, skip, shuffle and backpedal. Change direction on a call, but keep the pace easy enough to talk.
Minutes 2 to 5: active mobility
Use walking lunges with a reach, hip shifts, ankle rocks, arm circles and upper-back rotations. Spend 20 to 30 seconds on each movement.
Minutes 5 to 8: stance and level changes
Work two 20-second stance-and-motion rounds in each lead leg. Add one controlled level change every three or four steps.
Minutes 8 to 10: entries and sprawls
Do three to five penetration steps per side and three to five controlled sprawls. Freeze briefly in the finish position when a correction is needed.
Minutes 10 to 12: light partner reaction
Choose inside control, a collar-tie clear or hand touch with motion. Keep the resistance light, reset often and finish in stance.
For a competition day, run the same sequence at a lower total volume and gradually make the last minute more specific to the first match. Keep a sweatshirt on if the venue is cold, stay hydrated and do not spend all of your best energy before the whistle. The goal is to feel ready to wrestle, not proud of a brutal warm-up.
Common warm-up mistakes to leave behind
The first mistake is treating every warm-up like a conditioning test. Long bear crawls, endless sprints and penalty-style circuits may look hard, but they do not automatically prepare a wrestler for a better technical practice. They can also make a younger athlete tired before the part of training that needs focus.
The second mistake is holding every stretch for a long time before any movement. Static stretching has a place, especially in a separate mobility routine, but it does not replace active preparation for a sport built around position, acceleration and reaction. Move first, then use longer stretching later when it serves a clear flexibility need.
The third is ignoring the day in front of you. A hard live-wrestling practice, a tournament, a return from illness and a light technical session do not need identical openings. Keep the warm-up structure stable, then adjust the volume and contact level. Athletes who need a better plan for their overall weekly workload can use the wrestling workout guide and wrestling conditioning guide to keep extra work from stealing quality from the mat.
Start practice ready to earn the next rep
The best warm-up is the one a team can repeat without drama. It gets people moving, protects the positions that matter and makes the transition into drilling feel natural. Keep it simple enough that a coach can scan the room, athletes can remember the cues and everybody has enough energy left to do the real work.
That is what Hands Raised is built around: the daily choices that make the next practice count. Read more in the Wrestling Training journal, visit Athlete Spotlight for stories from athletes who keep showing up, or explore the Combat Sports Hats collection for a reminder of the standard outside the room.
Frequently asked questions
How long should a wrestling warm-up be?
For most practices, 10 to 15 focused minutes is enough. A tournament warm-up may take a little longer because the athlete needs time to raise body temperature, move through wrestling positions and settle into a ready pace without burning energy before the first match.
What are good wrestling warm-up drills?
Good wrestling warm-up drills include stance and motion, level changes, penetration-step rehearsals, hip mobility, shoulder mobility, light hand fighting and controlled sprawls. The best choices prepare the movements athletes will use in practice instead of adding random fatigue.
Should wrestlers stretch before practice?
Use active mobility before practice, then save longer, more relaxed stretching for after training or a separate mobility session. Before practice, wrestlers usually need to move, brace and react, not spend the entire warm-up holding one position.
How do you warm up before a wrestling match?
Start with easy movement, then build toward short, crisp wrestling actions. Move through stance, level changes, entries and light partner work. Finish feeling alert and ready, not breathless or tired from trying to turn the warm-up into another conditioning session.
Related posts

Wrestling training
Wrestling Drills: 10 Fundamentals for Better Practice
Ten wrestling drills that sharpen stance, movement, entries and hand fighting without turning practice into a random workout.
Read the guide →
Wrestling training
Wrestling Workout: A Week That Supports Practice
A practical wrestling workout plan that builds strength, conditioning and recovery without taking away from mat time.
Read the guide →