

Every new wrestler wants to know which move to learn first. The honest answer is less flashy and far more useful: learn how to hold a position before you try to win one. A stance that stays balanced, feet that move without crossing, and a simple shot you can repeat give every later skill somewhere solid to start.
That is good news. A beginner does not need a huge playbook on day one. They need a few reliable drills, a coach who can correct one detail at a time, and enough patience to repeat the basics after the first burst of excitement wears off. The USA Wrestling Level 1 curriculum starts the same way: stance, motion and penetration steps before more complicated offense.
Use this guide as a starting point for a first month on the mat. It does not replace a coach or make hard contact safe without the right partner and surface. It does give beginners and parents a simple order for the skills that make practice feel less confusing and more productive.
Start with one rule: positions before pace
A drill is not useful just because it makes everyone tired. For a new wrestler, a good repetition has a clear shape: feet under the body, knees bent, eyes forward, hands ready and enough balance to move in either direction. Once the shape disappears, speeding up often just rehearses the mistake.
Give each drill one job. In stance and motion, the job may be keeping the lead foot first without standing up. In a penetration step, it may be changing levels before moving forward. In hand fighting, it may be touching and clearing without reaching so far that the feet stop moving. A coach can add details later. A beginner learns faster when there is one thing to notice now.
Before partner work, check the room. Use real mats for contact, keep shoes and bags clear of the edge, and tell a coach about any injury or pain. A hard floor is not a place to practice throws, live shots or sprawling. The solo work in the at-home drills guide is a better option away from the wrestling room.
1. Stance checks: build a base you can return to
Start in a staggered stance with one foot slightly ahead, knees bent and hips back enough to feel athletic rather than folded over. Keep the chest proud, head up and hands in front where they can protect space. The goal is not to squat as low as possible. It is to feel balanced enough that a partner cannot easily pull you forward or push you backward.
Hold the stance for 15 to 20 seconds, reset, then switch the lead leg. Ask a coach which lead leg makes sense for the technique being taught, but do not become trapped in one side. The first drill is simply learning to recognize a useful starting position. If the heels get heavy, the back rounds or the hands drop to the thighs, reset before continuing.
The more detailed wrestling stance guide breaks down how to build that base over time. For now, a beginner only needs to know this: a good stance should let you move, react and keep your eyes on the person in front of you.
2. Stance and motion: move without giving the position away
From stance, take small steps in four directions: forward, back, left and right. The feet should travel without crossing, and the stance should look almost the same when you stop as it did when you started. Think of the feet as sliding along two tracks, not walking down a hallway.
Try three rounds of 20 seconds. In round one, move only forward and back. In round two, add side steps. In round three, have a partner point or call a direction while you keep the same posture. Stay far enough apart that neither person needs to reach. The goal is clean movement, not a race around the mat.

The common mistake is letting the feet do the work while the upper body stands up. When that happens, slow down. Bend the knees, bring the hands back in front and make the next five steps quieter. Good motion is a skill that makes entries, defense and hand fighting easier later, so it is worth practicing before it feels exciting.
3. Level changes: lower the body, not just the head
A level change is a small drop in height made by bending the knees and hips while keeping the chest over the legs. Beginners often look down and fold at the waist instead. That puts the head out in front and makes the next step slower and weaker.
Use a partner, coach’s hand or a light visual target as a cue. From stance, lower the level, touch the target with your eyes still forward, then come back to stance. Do five controlled repetitions per side. If the lead knee dives inward or the chest collapses, make the range smaller. The goal is to learn the shape, not to reach the floor.
Level changes teach an important habit: your posture can change without disappearing. That is the difference between being ready to attack and simply bending over in front of someone.
4. Penetration-step rehearsal: make the first step honest
The penetration step is the bridge between a level change and an actual shot. Begin in a stance, change levels, step the lead leg forward and let the back leg drive the body into a balanced finish. Your knee should land softly on a proper mat, the chest should stay up, and the hands should stay available rather than reaching to the floor.
For a first drill, do not add a partner. Pick a line on the mat, take one clean step to it, recover to stance, then switch sides. Five repetitions per leg are plenty when you are learning. A coach may teach slightly different details for a double leg, single leg or the rule set you are competing in, so let their instruction lead.
The important part is not how far the knee travels. It is whether the wrestler can arrive in a position that still has balance. If the trail leg drags, the knee crashes down or the head drops, return to the level-change drill and make the movement smaller.
5. Light hand fighting: learn distance before force
Hand fighting for beginners is not a contest to see who can shove harder. It is learning how to touch, clear and move while staying in stance. Start with a cooperative partner. One wrestler reaches for a shoulder or wrist with an open hand. The other clears the contact, returns hands to position and keeps the feet moving. Switch jobs after 20 seconds.

Use gentle pressure and stop when the drill turns into a scramble. The beginner lesson is distance: do not reach so far that the shoulders get ahead of the feet, and do not freeze after the first touch. A calm reset is part of the drill. It gives athletes a chance to repeat the same correction instead of spending every round reacting to chaos.
Once the stance and motion are steady, the wrestling drills guide gives more ways to connect hand fighting to entries and defense. Keep the sequence simple at first. Good contact begins with good feet.
When to add resistance
Resistance is useful when it gives the drill a question, not when it turns every repetition into a small match. Start with a partner who knows their job. For a movement drill, one person can point to a direction and the other follows while holding stance. For a penetration-step drill, a partner can offer a light target and stay still. For hand fighting, one person can make a single controlled touch while the other clears it and returns to position.
Move from no resistance, to cooperative resistance, to light reaction, then to more live work only when the earlier version stays clean. That order is not boring. It protects the habit a beginner is trying to build. A wrestler who cannot keep a stance against a cooperative partner is not helped by jumping straight into a hard round.
After each short round, ask one simple question: did the position hold up? If the answer is no, make the task smaller. Resetting the drill is not failing it. It is how athletes get enough useful repetitions to improve.
6. Sprawl and referee’s-position basics belong with a coach
New wrestlers also need a first look at defending a shot and moving safely on the mat. A sprawl is not just throwing the legs back. It asks the athlete to get the hips away, keep a strong upper body position and avoid landing on a partner. Referee’s position asks a different kind of control: a sturdy base, hands placed correctly and an understanding of the start before the whistle.
Those drills are valuable, but they need a coach and proper mats. Learn the set-up slowly, with a cooperative partner, before adding speed or resistance. The right first repetition may look almost boring. That is fine. Good wrestling is built by making the safe, balanced position familiar enough that it still shows up when the round gets fast.
Use a simple 20-minute beginner block
Five minutes: stance and motion
Alternate 20-second stance holds, forward and back steps, then side-to-side motion. Reset the moment posture starts to rise.
Five minutes: level changes
Do five controlled level changes per side. Keep eyes forward and hands ready. Use a coach’s cue or a partner-held target rather than bending toward the floor.
Five minutes: penetration-step rehearsal
Take five clean steps per leg on a mat, return to stance each time and stop before the positions get rushed.
Five minutes: cooperative contact
Use a light hand-fighting or touch-and-clear round with a partner. Keep the task clear, the pressure modest and the feet moving.
This block is not a replacement for team practice. It is a way to make the first few practices less overwhelming. A beginner who can recognize stance, motion, a level change and a clean first step is ready to get more from the coach’s next lesson than someone trying to memorize five new moves at once.
Carry the habit into the next practice
The fastest way to make early progress is to write down one correction after practice. Maybe it is “keep my lead foot first,” “bend my knees before I shoot” or “do not reach without my feet.” Bring that one cue back the next day. When it improves, trade it for the next one.
Hands Raised is for athletes who understand that quiet repetitions count. The first month may not come with a highlight, but it can build the positions that let a wrestler earn every later one. Read the wrestling warm-up guide before the next session, find the people doing the work in Athlete Spotlight, or explore the Hands Raised collection for a reminder of the standard you are building.
Frequently asked questions
What should a beginner wrestler practice first?
Start with stance, motion, level changes, a controlled penetration step, a basic sprawl and a safe way to move in referee’s position. These positions show up before the bigger moves, so a new wrestler gets more from them than from collecting a long list of attacks.
How often should beginners do wrestling drills?
A few focused blocks each week can help, especially when they reinforce the same correction a coach gave at practice. Keep the repetitions short and clean. More time is only useful when the athlete can still hold the positions the drill is meant to teach.
Can beginners practice wrestling drills at home?
Some solo drills are appropriate in a clear, safe space: stance and motion, level changes, shadow penetration steps and basic body-control work. Save throws, live takedowns and partner drills for a coach, trained partner and proper mat.
How long does it take to get better at wrestling?
There is no fast shortcut. New wrestlers usually make the most noticeable progress when they keep showing up, learn one correction at a time and repeat it until it holds together at a faster pace. A strong first month is about building habits, not looking advanced.
Related posts

Wrestling training
Wrestling Stance: Build a Base That Holds Up
A practical guide to wrestling stance, movement and simple drills that help athletes stay ready to attack, defend and recover.
Read the guide →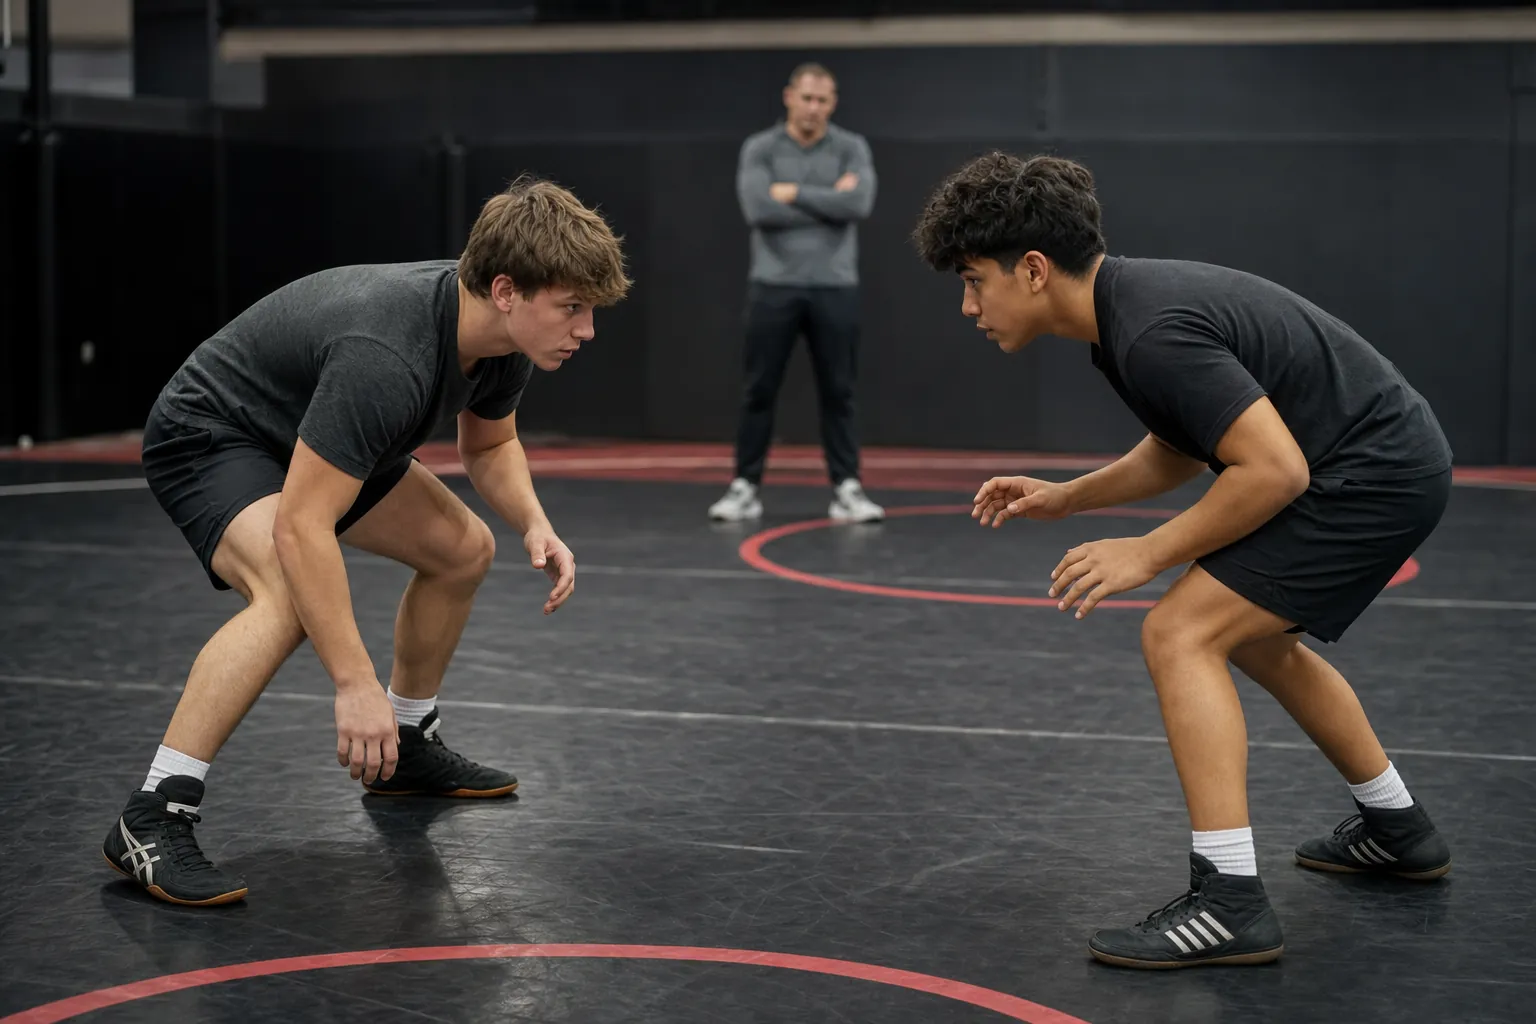
Wrestling training
Wrestling Drills: 10 Fundamentals for Better Practice
Ten wrestling drills that sharpen stance, movement, entries and hand fighting without turning practice into a random workout.
Read the guide →