

Footwork is not running in place with a lower stance. It is the quiet work that keeps a wrestler balanced enough to attack, defend, clear a tie or change direction without giving the position away. When the feet get too close, cross or stop underneath a reach, even a good idea becomes easier to read. When the feet stay underneath the athlete, the next movement has somewhere useful to start.
That is why the best wrestling footwork drills are simple. They do not need a ladder, a loud playlist or a long list of patterns. They need a real stance, a clear job and enough attention that an athlete can tell when posture starts to disappear. The NFHS coaching curriculum puts stance, motion, changing levels and attacks together as basic skills, which is a better order than treating foot speed as a separate trick.
Use this guide to build a short footwork block before practice, between technique stations or at home in a safe clear space. It is not a replacement for coaching or live wrestling. It is a way to make the first step, the recovery step and the angle step more dependable when practice gets fast.
Start with a stance that can move
A wrestling stance is not a pose to hold for a photo. It is a ready position. Keep the feet far enough apart to feel stable, knees soft, hips loaded, chest over the legs and hands available in front of the body. The exact height and lead leg can change with an athlete, a style and a coach’s instruction. The non-negotiable part is balance. A good stance lets a wrestler step in any direction without first standing straight up or leaning forward.
Before a drill, ask three quick questions: are the feet still under the hips, are the eyes up and can the athlete stop without falling forward? If the answer is no, make the movement smaller. The detailed wrestling stance guide can help athletes build that base. This session is about what happens after the stance begins to move.
1. Line steps: keep the lead foot honest
Find a line on the mat. From stance, move forward for three small steps and backward for three small steps. The lead foot moves first going forward, and the back foot moves first going backward. The second foot follows only far enough to rebuild the stance. Avoid bringing the feet together or crossing them. Those shortcuts can feel fast, but they make it harder to stop, change direction or react to an opponent.
Run three rounds of 20 seconds, changing the lead leg after each round. The goal is quiet, repeatable feet. If the shoulders rise, the hands drift down or the athlete begins reaching with the head, pause and reset. A good rep should look nearly the same at the end as it did at the start, just in a new place on the mat.
2. Lateral shuffles: move sideways without turning away
Choose two mat marks about three steps apart. Start in stance at one mark. Move sideways to the other and return, keeping the chest facing forward. The foot in the direction of travel moves first, then the trail foot follows to restore the base. Do not click the feet together in the middle. Do not let the hips turn completely away from the space in front of you.
This drill teaches a wrestler to stay available while making room or closing it. That matters when an opponent circles, when a tie needs to be cleared or when a wrestler is protecting the center of the mat. Keep the steps short. Long reaching steps often pull the weight outside the base, which is exactly the position a good opponent wants to see.

3. Mirror movement: let the eyes and feet work together
Pair up at a safe distance. One wrestler leads with slow movement while the other mirrors. The leader can move forward, back, laterally or in a small circle. The follower’s job is not to win the space. It is to keep stance, eyes and hands in a useful place while matching the direction. Switch every 20 seconds.
Start with no contact. The moment athletes reach, shove or turn the drill into live hand fighting, the learning job changes. The mirror version is valuable because it gives the feet something real to respond to without adding the chaos of a full exchange. USA Wrestling-connected coaching material uses stance-and-motion and positional games for that same reason: movement is easier to improve when the athlete can still recognize the position they are trying to keep.
4. Circle and cut off: make angles without chasing
For this drill, one wrestler slowly circles around the edge of a small marked area. The other stays in stance and takes short steps to keep the chest pointed toward the partner. Think about taking a small angle, not sprinting sideways. If the partner moves to the right, step with enough purpose to stay square, then settle back into the base. Switch roles after 20 seconds.
This is a useful correction for wrestlers who follow an opponent with their shoulders instead of their feet. Chasing with a reach leaves the hips behind. Controlled circling gives the wrestler a chance to manage space before an attack starts. Coaches can make it harder later by adding a light hand touch, a called direction or a finish to a safe, coached entry.
5. Level change and recovery: come back to stance on purpose
A level change only helps if a wrestler can recover from it. From stance, bend through the hips and knees while keeping the chest tall enough to see forward. Rise back into the same stance, then take one small angle step. The sequence is level change, recover, move. Do five repetitions to each side before adding speed.
Many athletes can drop levels once. The harder skill is returning to a position where they can attack again or defend a reaction. Keep the hands ready instead of dropping them to the floor. If the athlete folds at the waist, reduce the range and let the knees and hips do more of the work. Clean recovery is what stops a missed look from becoming a bad position.

6. Penetration-step returns: practice the way back out
A penetration step is usually taught as a way in. It is also worth rehearsing the way back to stance. From a controlled step on a proper mat, drive back to the feet, rebuild the stance and take one small motion step. Alternate sides. Keep the first rounds slow enough that the athlete can feel whether the trail leg helps the recovery or drags behind it.
This is not a drill for crashing a knee onto hard ground or racing through poor shape. The penetration-footwork progression demonstrated by Zeke Jones includes repeat steps, angle shooting and hand placement. The takeaway for a developing wrestler is simple: a step is only useful when it finishes in a position that can keep working.
7. Shadow hand-fight movement: move before the reach
Stand in front of an imaginary partner. Take two motion steps, make a small level change, then show a light hand touch without leaning past the front knee. Clear the imaginary tie, circle one step and return to stance. Repeat for 20 seconds, rest, then switch the lead leg.
Shadow work can feel silly when it has no detail. Give it one. Maybe the cue is “feet before hands,” “circle after the clear” or “recover to stance.” The goal is not to act out a full match. It is to make a useful sequence familiar enough that it appears during live drilling. Athletes who want a fuller neutral-practice block can combine this with the wrestling drills guide and the wrestling warm-up routine.
Use this 12-minute footwork block
Two minutes: stance checks
Hold each lead leg for 15 seconds, reset and add small forward-backward steps. Keep the body quiet above the knees.
Three minutes: line steps and lateral shuffles
Use 20-second rounds. Keep the lead foot first in the direction of travel and rebuild the stance after every step.
Three minutes: mirror movement
Work with a partner at safe distance. Match direction without reaching or turning the drill into a hand-fighting round.
Two minutes: circle and cut off
Stay square to the moving partner with short controlled angles. Finish every round in a stance you could attack or defend from.
Two minutes: level-change recovery
Drop through the hips and knees, recover to stance, then add one small angle step. Keep the first repetitions slow and clear.
That is enough work to improve a habit without draining the next practice. If the group has a hard live session ahead, keep the pace controlled. If it is a technique day, a coach can add a light reaction or a coached entry after the positions stay solid. The USA Wrestling curriculum-based skill warm-up examples make the same useful distinction: footwork and position work belong in training, but they should support technique rather than become random fatigue.
Know when to stop and get coached
Footwork should make wrestling positions safer and more useful, not hurt. Stop if an athlete has pain, dizziness or cannot control the landing on a mat. Keep throws, hard shots, live defense and intense partner resistance for a trained coach and an appropriate practice setting. A coach can see the details a solo athlete cannot, especially whether a knee, back or head position needs a correction.
Hands Raised is built around the work most people do not see. A clean stance, one recovered step and a better angle may not make a highlight today. Put enough good repetitions together, though, and they give every later attack a better chance to work. Keep building with the wrestling conditioning guide, read the athletes who keep showing up in Athlete Spotlight or explore the Hands Raised collection.
Frequently asked questions
What are the best wrestling footwork drills?
The best wrestling footwork drills let athletes rehearse a real position without letting speed hide mistakes. Stance-and-motion rounds, mirror movement, circle-and-cut-off work, level-change recovery and controlled penetration-step returns are useful because they connect the feet to the positions wrestlers use in neutral.
How can wrestlers improve footwork at home?
A wrestler can rehearse stance holds, small forward and backward steps, lateral motion, circles and shadow entries in a clear space. Keep it controlled and save live shots, throws, hard sprawls and partner contact for a coach and a proper mat.
Should wrestlers use an agility ladder?
An agility ladder can be useful for general coordination, but it does not replace wrestling movement. Use it as a short warm-up or change-of-direction exercise, then spend most of the session in a wrestling stance with the hands, hips and head in the positions the sport actually asks for.
How often should wrestlers practice footwork?
Short, focused blocks several times a week are more useful than one exhausted session. Five to ten minutes before practice or during a skill warm-up can build a strong habit when every round has one clear coaching cue.
Related posts

Wrestling training
Wrestling Stance: Build a Base That Holds Up
A practical guide to wrestling stance, movement and simple drills that help athletes stay ready to attack, defend and recover.
Read the guide →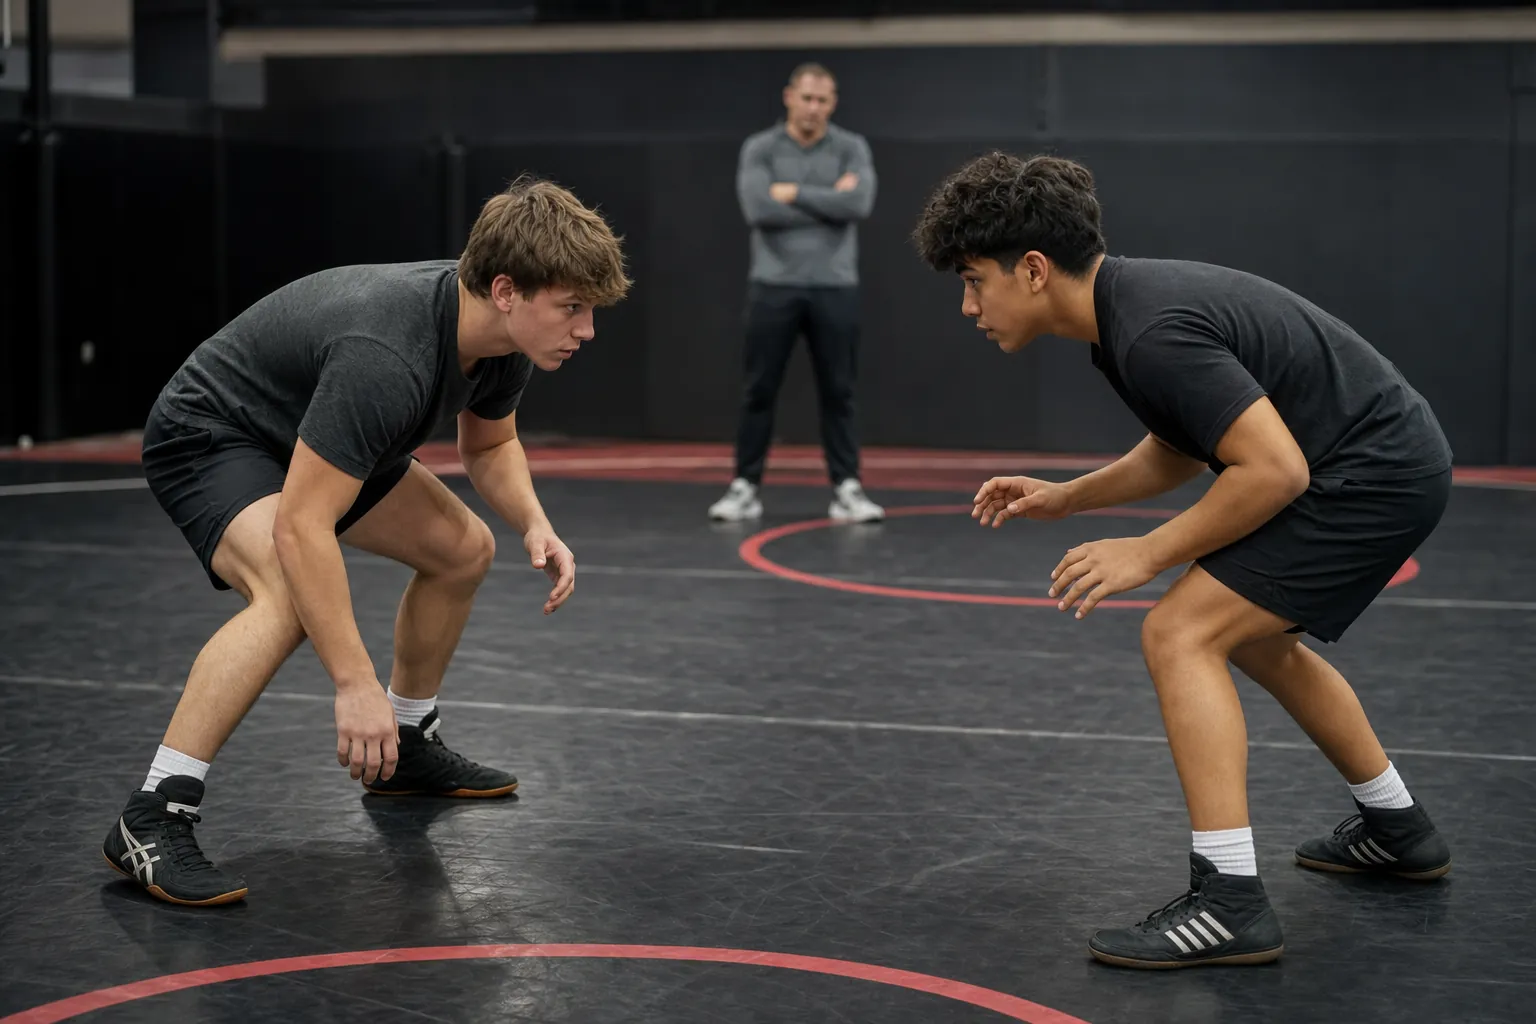
Wrestling training
Wrestling Drills: 10 Fundamentals for Better Practice
Ten wrestling drills that sharpen stance, movement, entries and hand fighting without turning practice into a random workout.
Read the guide →